
You built a beautiful Showit site. You hit publish. Then you waited. And nothing happened in Google.
The problem is almost never the design. It is almost always the SEO settings. Showit gives you a surprisingly complete set of SEO controls spread across three different locations inside the platform, and most users either miss them entirely or configure only a fraction of what is available. The result is pages that Google cannot read correctly, headings that fire as H1 forty times per page, and sitemaps that never get submitted.
This guide walks you through every single Showit SEO setting, in the order you should configure them, with field names, recommended values, and the reasoning behind each decision. Whether you are setting up a brand new site or auditing an existing one, this is the complete reference.
If you want context on how Showit handles SEO at a platform level before diving into the settings, read Is Showit good for SEO first. For a broader strategy framework, the detailed Showit SEO guide covers everything from keyword research to link building for Showit sites.
Showit SEO settings are found in three places: site-wide settings (Site Settings > SEO), per-page settings (Page Settings > SEO tab), and the connected WordPress blog (via Rank Math or Yoast). Fill in every field, submit your sitemap to Google Search Console, and you have the complete foundation.
Where Are Showit SEO Settings? The Three Locations
This is the first question almost every new Showit user asks, and it trips people up because the answer is not one place. It is three distinct locations, each controlling a different scope of your SEO.
Location 1: Site Settings (Site-Wide SEO)
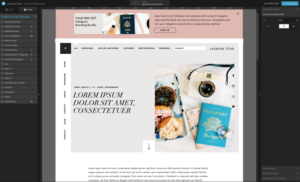
Click the gear icon in the top-left corner of the Showit editor. This opens Site Settings. Inside, you will find a dedicated SEO section. Everything you configure here acts as a site-wide default. It covers your site title, your default meta description, your social sharing image, and your analytics integrations. Think of this as your SEO foundation layer. If a page does not have its own specific settings, Google falls back to whatever you have entered here.
Location 2: Page Settings (Per-Page SEO)
In the left panel of the Showit editor, you can see all of your pages listed. Click any page name, and a small settings icon appears next to it. Click that icon to open Page Settings. Navigate to the SEO tab. This is where you set the individual meta title, meta description, URL slug, noindex toggle, and social sharing image for each specific page. These settings override the site-wide defaults for that page only.
Location 3: WordPress Blog (Blog Post SEO)
Every Showit site is powered by a connected WordPress install that handles the blog. Your Showit canvas pages and your WordPress blog posts are two separate systems. The canvas pages use Showit’s built-in SEO fields. Your blog posts use whichever WordPress SEO plugin you have installed, typically Rank Math or Yoast SEO. You access this by clicking “Open WordPress” inside the Showit editor, or by going directly to yourdomain.com/wp-admin.
Understanding this split is fundamental. Many Showit users configure their canvas pages correctly and then completely ignore their WordPress blog SEO settings, effectively leaving half of their content invisible to Google.
Site-Wide SEO Settings: Building Your Foundation
Open Site Settings and navigate to the SEO section. Go through each field in order.
Site Title
This is your brand name as it appears in search results when no page-specific title is set. It also appends to your individual page meta titles by default. Keep it short, accurate, and consistent with how you want your brand to appear in Google. For example: “Adil Makhdoom” or “Studio Name” or “Business Name.” Do not stuff keywords here. This field is read by Google, social platforms, and browser tabs.
Default Meta Description
This is the fallback description that appears in Google search results for any page that does not have its own meta description. Write one or two sentences that describe your overall site clearly. Aim for 140 to 155 characters. Include your primary brand keyword naturally. This default will rarely be shown if you configure descriptions for every individual page, but it is a critical safety net and also gets used by social platforms when someone shares your homepage.
Social Sharing Image (Open Graph Image)
This is the image that appears when someone shares your homepage link on social media. Upload a horizontal image at 1200 x 630 pixels. Use a clean, branded image: your logo on a solid background, a hero image from your site, or a designed graphic with your brand name. Avoid busy images with small text. This setting only applies to your homepage and any page that does not have its own Open Graph image set.
Google Analytics Connection
In Site Settings, find the Integrations or Analytics section (the exact label varies slightly by Showit version). Paste your GA4 Measurement ID here. It follows the format G-XXXXXXXXXX. You get this from your Google Analytics 4 account under Admin, then Data Streams, then your web stream. Once you save and republish, Showit injects the GA4 tracking code into every canvas page automatically.
Important note: this only tracks your canvas pages. Your WordPress blog has a separate URL path (typically at /blog/). You will need to add GA4 tracking to WordPress separately, either through Rank Math’s analytics module, a Site Kit by Google plugin, or a header injection plugin. Both should point to the same GA4 property so your data consolidates in one place.
Google Search Console Verification
This is covered in depth in its own section below. Within Site Settings, there is a field for your Google Search Console verification meta tag. You will paste the HTML verification tag content value here, not the entire tag itself. For example, if Google gives you this tag:
<meta name="google-site-verification" content="abc123xyz456" />
You paste only the content value: abc123xyz456
Page-Level SEO Settings: Optimizing Every Page
This is where the real SEO work happens. Every page on your Showit site needs its own configured SEO settings. Do not skip this step for any page that you want Google to index and rank.
Meta Title Formula
Click your page in the left panel, open Page Settings, and go to the SEO tab. The Meta Title field is the most important SEO field on the page. This is the blue clickable text that appears in Google search results.
A reliable formula for most pages: Primary Keyword + Secondary Keyword + Brand Name, separated by pipes or hyphens. Keep it under 60 characters so it does not get cut off in search results. Examples:
- Brand Identity Designer for E-Commerce | Studio Name
- Showit Web Design Services | Adil Makhdoom
- Wedding Venue in Austin TX | Venue Name
Do not repeat your brand name if Showit is already appending it automatically. Check whether your Site Settings have the “Append Site Title” option enabled and account for those characters in your count.
Meta Description Best Practices
The meta description does not directly affect your ranking, but it heavily affects whether someone clicks your result. Write 140 to 155 characters. Include your primary keyword for the page naturally, a clear benefit statement, and ideally a soft call to action. Write it for the human reader, not for Google.
Bad example: “This is the about page for our website. We offer services.”
Good example: “Adil Makhdoom is a Showit web designer and SEO specialist helping service businesses get found on Google. See the work and process.”
URL Slug Rules
The URL slug field in Page Settings controls the path after your domain. Follow these rules without exception:
- Use lowercase letters only
- Separate words with hyphens, not underscores
- Include your primary keyword for the page
- Keep it as short as possible while remaining descriptive
- Never use query strings or special characters
Good slugs: /services/, /showit-web-design/, /contact/
Bad slugs: /Services/, /showit_web_design/, /page1/, /?page=about
If you change a slug on a published page, you must set up a redirect from the old URL to the new one. Showit does not do this automatically.
Noindex Toggle
The noindex toggle in the SEO tab tells Google not to include this page in search results. Use it for:
- Thank-you pages after form submissions
- Password-protected client pages
- Duplicate landing page variations you use for ads
- Staging or test pages you have published but do not want indexed
- Pages with very thin content that do not serve a search purpose
Do not noindex pages you want to rank. That sounds obvious, but it is a common mistake when someone accidentally toggles this on a service page or portfolio page.
Open Graph Image Per Page
Each page can have its own social sharing image. This is the image that appears when someone shares that specific page link on social media or messaging apps. Upload a 1200 x 630 pixel horizontal image for each key page: homepage, about, services, and any page you actively share or link to. Pages without their own Open Graph image fall back to your site-wide default.
The Most Commonly Missed Showit SEO Setting: Heading Tag Assignment
This is the setting that quietly destroys the SEO of more Showit sites than any other single issue. Most designers never touch it. Most site owners do not know it exists. And the default behavior in Showit creates a serious structural SEO problem.
The 36 H1 Problem
When you add a text element to the Showit canvas and never assign an HTML tag to it, Showit defaults to rendering certain elements as H1 tags in the HTML output. On a typical Showit homepage with multiple text boxes for the hero, sections, testimonials, and callouts, this can result in Google seeing 20, 30, or even 36 H1 tags on a single page.
Google expects each page to have exactly one H1 tag. The H1 is how you tell Google the primary topic of the page. When every text element fires as H1, Google cannot determine what the page is actually about. Your heading structure becomes meaningless noise. This directly undermines your ability to rank for anything.
How to Fix It: Assigning HTML Tags in Showit
Click any text element on the canvas. In the right-side Design panel, scroll down until you see a field labeled HTML Tag (sometimes listed under Typography or Advanced settings depending on your Showit version). You will see a dropdown with options: Paragraph, H1, H2, H3, H4, H5, H6, Div, and Span.
Assign tags according to this hierarchy:
- H1: The single most important heading on the page. Use it once, for your primary keyword phrase. This is typically your hero headline.
- H2: Major section headings on the page. Each distinct section of content gets an H2.
- H3: Sub-sections within an H2 section. Use for individual service items, FAQ questions, or steps within a process.
- Paragraph: All body text, captions, quotes, and any text that is not a heading.
- Span or Div: Decorative text, labels, or text elements you want excluded from the heading hierarchy entirely.
Go through every text element on every page. Yes, every single one. This is tedious but it is one of the highest-impact SEO actions you can take on a Showit site. If you want the full strategy around this, the Showit SEO checklist includes a step-by-step heading audit process.
Why Designers Skip This Setting
Heading tags in Showit are purely a back-end SEO decision. Changing an element from H1 to Paragraph does not change how it looks on your site at all. The visual design is controlled entirely by your styles and typography settings, not the HTML tag. Because there is no visual feedback when you make this change, designers who are not SEO-focused skip it completely. Nothing looks different. Nothing breaks. But your SEO takes a significant hit.
Connecting Google Search Console to Showit
Google Search Console (GSC) is free, and it is the single most important tool for monitoring and improving your Showit site’s search performance. Here is how to connect it and configure it correctly.
Step 1: Add Your Property in GSC
Go to search.google.com/search-console and sign in with your Google account. Click Add Property and enter your domain. Choose the URL prefix method for simplicity, entering your full URL including https://
Step 2: Verify via HTML Tag in Showit
Google will offer several verification methods. Choose the HTML Tag option. Google will display a meta tag like this:
<meta name="google-site-verification" content="YOUR_VERIFICATION_CODE" />
Copy only the value inside the content attribute (not the entire tag). Go back to Showit, open Site Settings, find the Google Search Console Verification field, and paste that value there. Save and republish your Showit site. Return to Google Search Console and click Verify. If the site was republished correctly, verification will succeed within a few minutes.
Step 3: Submit Your Showit Canvas Sitemap
After verification, click Sitemaps in the left panel of GSC. In the Add a new sitemap field, enter:
sitemap.xml
Showit automatically generates this sitemap at yourdomain.com/sitemap.xml. It contains all of your canvas pages (homepage, about, services, portfolio, contact, and any other Showit-built pages). Submit it and wait for GSC to process it, which usually takes a few hours to a day.
Step 4: Submit Your WordPress Blog Sitemap Separately
This is the step most people miss. Your WordPress blog lives at a separate path (usually yourdomain.com/blog/) and has its own sitemap generated by your SEO plugin. You need to submit this separately in GSC.
If you are using Rank Math, the sitemap URL is typically: blog/sitemap_index.xml
If you are using Yoast SEO, it is typically: blog/sitemap_index.xml
You can confirm your exact blog sitemap URL by going to yourdomain.com/blog/sitemap_index.xml in your browser. If it shows an XML file with links to post sitemaps, that is your URL. Submit it in GSC as a second sitemap entry.
Why Two Sitemaps Are Needed
The Showit canvas and the WordPress blog are technically two different systems running on the same domain. Showit’s auto-generated sitemap only knows about canvas pages. WordPress’s SEO plugin only knows about posts and categories. Neither one knows about the other’s content. Submitting both gives Google a complete picture of every URL on your site and ensures nothing gets missed during crawling.
Showit Image SEO Settings
Images are one of the most overlooked aspects of Showit SEO configuration. Every image element on your canvas has SEO fields that most users leave blank.
Alt Text vs. Image Title in Showit
When you click an image element in Showit and open its settings, you will see two fields that are commonly confused: Image Title and Alt Text.
Alt Text is what matters for SEO. It is the text that Google reads to understand what an image depicts. Screen readers also use it for accessibility. Write alt text as a concise, accurate description of what the image shows, naturally including a relevant keyword when appropriate. Example: “Showit website design for a brand strategist, homepage layout.”
Image Title is a tooltip that appears when a user hovers over the image in some browsers. It has no significant SEO value. Most users either leave it blank or enter the same text as the alt text. Do not prioritize it over alt text.
Every content image should have alt text filled in. Background images used purely for decoration can have empty alt text, as they convey no informational content.
Background Image SEO Settings
Background images in Showit (images applied as a canvas background rather than as an image element) are more complex from an SEO perspective. Google can sometimes index background images, but they are harder for crawlers to associate with meaningful alt text.
For SEO purposes, if an image is important to your content (a portfolio piece, a product photo, a team photo), use it as a proper image element with alt text rather than as a background. Reserve background images for decorative textures, color overlays, and atmospheric visuals that do not carry content meaning.
File Naming Before Upload
This is a pre-upload step but it directly feeds Showit’s SEO output. Before uploading any image to Showit, rename the file with descriptive, keyword-relevant names using hyphens between words.
Bad filename: IMG_4823.jpg
Good filename: showit-web-designer-portfolio-homepage.jpg
Google reads image filenames as a signal for what the image depicts. A properly named file reinforces the alt text and the surrounding content context. It also helps your images rank in Google Image Search, which can drive additional referral traffic.
The Hidden Mobile and Desktop Canvas Problem
This is one of the more subtle SEO issues in Showit, and it catches even experienced designers off guard.
How Showit Handles Mobile and Desktop Canvases
Showit uses a unique dual-canvas system. You design the desktop version and the mobile version separately. You can show an element on desktop and hide it on mobile, or vice versa. This gives you tremendous design flexibility. But there is a catch that matters for SEO.
When you hide an element on mobile but show it on desktop, Showit still includes that element in the HTML output for both versions. The hiding is done via CSS display properties, not by removing the element from the DOM. Google’s crawler reads the raw HTML, including elements that are visually hidden via CSS.
What This Means for SEO
If you have two different headline text elements, one for desktop and one for mobile, both with H1 tags assigned, Google sees two H1 tags. If you have a paragraph of descriptive copy on desktop that you replaced with a condensed version on mobile, both versions appear in the HTML. Google indexes the content it finds in the source code, not the content visible to a user on a specific device.
This can create several issues. You may end up with duplicate heading tags. You may have duplicate content signals from closely similar but not identical copy blocks. Your word count and keyword density calculations based on what you see visually will not match what Google actually crawls.
How to Handle It Correctly
First, audit your heading tags on both canvases. If you have a desktop H1 and a separate mobile H1, assign one of them as Paragraph or Div and let the visual styling do the work of making it look like a heading.
Second, whenever possible, use the same text content for both desktop and mobile versions of a text element. Resize, reposition, and reformat for mobile, but keep the words identical. This eliminates any duplicate content concern from the dual-canvas approach.
Third, for elements that are truly decorative and have no content value on one device, consider whether you need separate elements at all, or whether responsive sizing within a single element would achieve the same visual result without the duplication.
For a comprehensive walkthrough of how this affects overall strategy, the complete Showit SEO guide covers the technical architecture of Showit’s rendering in more detail.
Showit SEO Settings for the WordPress Blog
The WordPress blog attached to your Showit site is where most of your long-term SEO growth will come from. Blog posts target informational search queries, build topical authority, and drive consistent organic traffic over time. Configuring the WordPress SEO settings correctly is not optional.
Installing Rank Math or Yoast SEO
Go to your WordPress dashboard and navigate to Plugins, then Add New. Search for either Rank Math SEO or Yoast SEO. Both are free and both are excellent. Rank Math tends to offer more features in the free tier, including schema markup and redirect management. Yoast has a longer track record and a larger user base. Install one and only one. Running both creates conflicts.
Complete the setup wizard for whichever plugin you choose. It will walk you through basic configuration including your site type, social profiles, and sitemap settings.
Configuring the Sitemap
In Rank Math: go to Rank Math, then Sitemap Settings. Enable the XML sitemap. Make sure Posts and Pages are included. Exclude any post types you do not want indexed (like form entries or WooCommerce product types if they are not relevant). The sitemap will be available at yourdomain.com/blog/sitemap_index.xml.
In Yoast: go to Yoast SEO, then Settings, then XML Sitemaps. Enable XML sitemaps. The same inclusion and exclusion options apply.
Setting Default Title and Description Patterns
Both plugins let you set default patterns for how titles and descriptions are generated across all posts and pages. For blog posts, a reliable default title pattern is: Post Title + Separator + Site Name. This ensures every post has a properly formatted title even if you forget to set a custom one.
For the meta description, set a default that pulls from the post excerpt. This means that as long as you write an excerpt for each post (which you should), you will always have a reasonable meta description without having to fill in a separate field.
Enabling Breadcrumbs
Breadcrumbs help Google understand your site structure and they can appear in search results as navigational links beneath your page title. Enable breadcrumbs in your SEO plugin settings and then add the breadcrumb shortcode or function to your WordPress blog template, typically in your blog post header area.
In Rank Math: enable breadcrumbs under General Settings, then add [rank_math_breadcrumb] to your post template.
In Yoast: enable breadcrumbs under Yoast SEO, then Search Appearance, then Breadcrumbs.
Schema Auto-Generation
Both plugins automatically generate schema markup for your blog posts. By default, blog posts get Article or BlogPosting schema. Make sure this is enabled. For specific post types like how-to guides or FAQ posts, both Rank Math and Yoast allow you to add additional schema types (HowTo, FAQPage) directly from the post editor. Use these whenever the content matches the schema type. Google can display rich results for both, which significantly improves click-through rates from search.
Showit Site Speed Settings
Page speed is a confirmed Google ranking factor, and it also affects how long visitors stay on your site. Showit gives you some controls and handles others automatically. Understanding the distinction saves you time and frustration.
What You Control: Image Compression Before Upload
The biggest speed lever you have in Showit is what you do before uploading an image. Showit does not compress your images on upload. It serves them at the size you provide.
Target file sizes before upload:
- Hero and full-width background images: under 300KB, ideally under 200KB
- Portfolio and gallery images: under 150KB each
- Thumbnails and small UI images: under 50KB
- Blog post featured images: under 150KB
Use a tool like Squoosh, ImageOptim, or TinyPNG to compress images before upload. Export images at the maximum size they will actually display on screen. A background image that displays at 1440px wide does not need to be exported at 4000px wide. Match export dimensions to display dimensions.
For format, WebP is the best choice for web performance. JPEG is acceptable for photos. PNG should be reserved for graphics with transparency. Avoid uploading raw camera files or uncompressed TIFFs.
What Showit Handles: Cloudflare CDN
All Showit sites are served through Cloudflare’s content delivery network automatically. This means your site assets are distributed across global data centers and served from the location closest to each visitor. You do not need to configure this. It is on by default and it provides meaningful page speed improvements for visitors outside your hosting region.
Cloudflare also handles basic DDoS protection, HTTPS certificate management, and some caching. These all benefit speed and security without any action on your part.
What You Cannot Control Directly
Showit’s canvas-based architecture loads all desktop and mobile assets in the same HTML payload. You cannot implement lazy loading for canvas images the way you would in a traditional coded site. You cannot defer canvas JavaScript or aggressively minify Showit’s core rendering scripts. These are platform-level decisions made by Showit.
This means that heavily image-dense Showit sites may score lower on tools like PageSpeed Insights than a lean coded site. The practical impact on real-world user experience is typically smaller than the scores suggest, especially given the Cloudflare CDN layer. Focus your energy on what you can control (image compression, limiting third-party scripts) rather than chasing a perfect PageSpeed score.
Core Web Vitals Checklist
Google’s Core Web Vitals measure three real-world performance signals. Here is how each applies to Showit sites:
Largest Contentful Paint (LCP): This measures how fast your largest visible element loads. For most Showit sites, this is the hero image or hero background. Compress your hero image aggressively. Keep it under 200KB.
Cumulative Layout Shift (CLS): This measures visual stability. Elements should not jump around as the page loads. In Showit, this is most commonly caused by fonts loading late and causing text to reflow. Use system fonts for critical above-the-fold text or ensure your Google Fonts are preloaded.
Interaction to Next Paint (INP): This measures responsiveness to user interaction. Showit sites generally perform acceptably here. Issues arise when you embed heavy third-party scripts (chat widgets, form tools, video players) that block the main thread.
Complete Showit SEO Settings Checklist
Before Launch
- ☐ Site Settings: Site title entered, clear and brand-accurate
- ☐ Site Settings: Default meta description written (140-155 characters)
- ☐ Site Settings: Social sharing image uploaded (1200 x 630px)
- ☐ Site Settings: GA4 Measurement ID entered
- ☐ Every page: Meta title configured using keyword + brand formula
- ☐ Every page: Meta description written (140-155 characters)
- ☐ Every page: URL slug set to clean, lowercase, hyphenated format
- ☐ Every page: HTML tag assigned to every text element (exactly one H1 per page)
- ☐ Every page: Thank-you and utility pages set to noindex
- ☐ Every image: Alt text filled in for all content images
- ☐ All images compressed before upload (hero under 200KB, others under 150KB)
- ☐ WordPress blog: Rank Math or Yoast installed and configured
- ☐ WordPress blog: XML sitemap enabled in SEO plugin
- ☐ Google Search Console: Site verified via HTML tag method
- ☐ Google Search Console: Both sitemaps submitted (canvas + WordPress blog)
Ongoing Maintenance
- ☐ Check GSC monthly: coverage errors, manual actions, Core Web Vitals report
- ☐ Every new blog post: custom meta title, meta description, and focus keyword set
- ☐ Every new page added to Showit: full SEO tab completed before publishing
- ☐ Any URL change: redirect set up from old slug to new slug
- ☐ Quarterly: audit heading tags on all canvas pages for any new text elements added
Frequently Asked Questions
Where are SEO settings in Showit?
Showit SEO settings live in three places: Site Settings (the gear icon in the top-left) for site-wide defaults, Page Settings (click any page in the left panel and open the SEO tab) for individual page meta data, and your connected WordPress dashboard for blog post SEO via Rank Math or Yoast.
How do I add a meta description in Showit?
Click any page in the left panel, open Page Settings, and navigate to the SEO tab. You will find a Meta Description field there. Write 140 to 155 characters that describe the page clearly, include your primary keyword naturally, and end with a soft call to action. For site-wide defaults, go to Site Settings and fill in the Default Meta Description field.
Does Showit have an SEO plugin?
Showit does not have a native SEO plugin for the drag-and-drop canvas. However, because every Showit site runs on a connected WordPress install, you can use Rank Math or Yoast SEO to control your blog posts, sitemaps, schema, and breadcrumbs. Your Showit canvas pages have built-in SEO fields inside Page Settings that handle meta titles, descriptions, slugs, and noindex settings.
How do I submit my Showit sitemap to Google?
Submit two sitemaps in Google Search Console. First, submit yourdomain.com/sitemap.xml, which is the Showit canvas sitemap covering all your non-blog pages. Second, submit your WordPress blog sitemap (typically yourdomain.com/blog/sitemap_index.xml), which covers all blog posts. Both are necessary for complete Google indexing because Showit and WordPress are two separate systems running on the same domain.
How do I fix heading tags in Showit?
Click any text element on the canvas, open the Design panel on the right, and scroll to the HTML Tag setting. Change the tag from the default to the correct heading level: H1 for your main page heading (use it exactly once per page), H2 for major section titles, H3 for sub-sections, and Paragraph for all body text. Go through every text element on every page. Changing the HTML tag does not affect how the text looks visually.
Can I noindex a page in Showit?
Yes. Click the page in the left panel, open Page Settings, go to the SEO tab, and toggle on the Noindex option. This tells Google not to index that page. Use it for thank-you pages after form submissions, password-protected client pages, duplicate ad landing pages, and any page you do not want appearing in search results.
How do I connect Google Analytics to Showit?
In Showit, go to Site Settings, then the Integrations or Analytics tab. Paste your GA4 Measurement ID (format: G-XXXXXXXXXX) into the Google Analytics field. Showit injects the tracking snippet into every canvas page automatically after you save and republish. For your WordPress blog, add the GA4 tag separately via Rank Math’s Analytics module, the Site Kit by Google plugin, or a header injection plugin, using the same GA4 property so all data consolidates in one place.
Final Thoughts
Showit SEO configuration is more hands-on than most platform users expect. The settings are there, they are comprehensive, and they work. But they require you to actively find them, understand what each field does, and work through them systematically across every page on your site.
The three areas where Showit site owners consistently leave SEO performance on the table are heading tag assignment (the H1 problem is widespread and easy to miss), failing to submit both sitemaps to Google Search Console, and leaving the WordPress blog SEO plugin unconfigured. Correct all three and you will be ahead of the majority of Showit sites in your niche from a technical foundation standpoint.
From there, SEO is about content: publishing well-researched posts that answer questions your audience is already searching for, building internal links between related pages, and earning links from other sites over time. The settings in this guide create the technical foundation that makes all of that content work. Without them, even great content struggles to get indexed and ranked correctly.
If you want to go deeper on content strategy and the full SEO picture for Showit sites, start with the complete Showit SEO guide and then bookmark the Showit SEO checklist for your ongoing reference.
Written by
Adil Makhdoom is a Showit web designer and SEO specialist focused on helping service-based businesses rank on Google. He writes about Showit, technical SEO, and building sites that convert.
For ongoing SEO monitoring, connect your site to Google Search Console — it shows which keywords drive traffic, which pages are indexed, and any crawl errors that need attention.