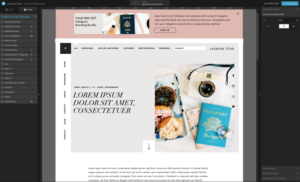


A Showit blog template is the fix most new users don’t know they need. You spend weeks designing a beautiful main site, publish it, then visit your blog – and it looks like a completely different website. Generic WordPress styling, mismatched fonts, wrong colours. The right blog template closes that gap completely.
This guide explains exactly how Showit blog templates work, where to get one, and how to install and configure it so your blog looks like a seamless part of your main site.
Your Showit blog runs on WordPress, which uses a WordPress theme for its design – completely independent from your Showit canvas. Most quality Showit templates include a matching WordPress theme in the package. If yours doesn’t, you need to install one separately. Setup takes 30–60 minutes once you have the right theme file, and it makes the difference between a blog that looks professional and one that looks abandoned.
Why Your Showit Blog Looks Different from Your Main Site
Understanding why the mismatch happens is the first step to fixing it. Showit’s platform has a split architecture that isn’t always obvious when you sign up:
- Your main Showit site (homepage, about, portfolio, services, contact) is designed in Showit’s visual canvas – a proprietary drag-and-drop system where you control every pixel
- Your blog runs on a separate WordPress installation that Showit provisions and manages for you
- WordPress uses a theme to control how blog posts, the post list page, category pages, and the blog archive look – completely independent from the Showit canvas
When you first set up your Showit site, WordPress installs with a default theme – typically a generic theme with no connection to your main site’s visual identity. Until you install a properly matched WordPress theme, your blog will look nothing like your main site.
A “Showit blog template” is really a WordPress theme that has been designed to visually match a specific Showit canvas template – same font families, same colour palette, same overall aesthetic character. The two components – canvas and theme – work together to create a cohesive experience across your entire site.
Where to Get a Showit Blog Template
Option 1: It’s Already Included in Your Template Package
If you purchased a premium Showit template from a reputable designer, there’s a good chance a matching WordPress theme was included. Check your original template download package for a .zip file alongside the .showit file. Many photographers discover their matching blog theme has been sitting unused in their downloads folder since they set up their site.
Template marketplaces and designers who typically include matching WordPress themes with their Showit templates: Tonic Site Shop, Northfolk Creative, Show Pony Creative, Grace & Vine Studios, and Davey & Krista. If you purchased from any of these and don’t see a theme file, check your account downloads or contact their support.
Option 2: Purchase a Matching WordPress Theme Separately
If your Showit template didn’t include a blog theme, or if you want a more custom look for your blog than what’s included, you can purchase a standalone WordPress theme designed for Showit blogs. These are built to work with Showit’s URL structure and blog embed features, and they typically come with matching font and colour configurations that mirror popular Showit template aesthetics. Prices range from $50–$200 for a standalone WordPress blog theme.
Option 3: Use a Well-Designed Generic WordPress Theme
A high-quality generic WordPress theme – like Kadence, GeneratePress, or Blocksy – can work perfectly well as a Showit blog theme even without being “Showit-specific.” These themes are fast, SEO-friendly, and highly customisable. You’ll configure fonts and colours to match your main site manually, but the technical functionality is identical. Kadence and GeneratePress both have free tiers that are more than adequate for most photographer blogs.
If you’re choosing this route, prioritise: lightweight themes with fast load times, clean typography options, strong compatibility with Yoast SEO, and a straightforward customiser for colours and fonts.
How to Install Your Showit Blog Theme
Once you have a WordPress theme file (a .zip file – not to be confused with a .showit file):
- Log in to your WordPress dashboard. The URL is typically
yourdomain.com/blog/wp-admin/. If you don’t know your login credentials, you can reset them from your Showit account dashboard. - Go to Appearance → Themes → Add New → Upload Theme
- Click “Choose File,” select your
.ziptheme file, and click Install Now - After installation completes, click Activate
- If the theme comes with a setup wizard or demo importer, run it – this applies the theme’s default styling and layout configurations
After activation, visit your blog URL to check the initial state. The theme structure should now be in place. You’ll almost certainly need to customise fonts, colours, and header/footer settings to match your main site – but the foundation is there.
Customising Your Blog Theme to Match Your Main Site
Typography (Fonts)
Font matching is the most visually impactful customisation. If you know which fonts you’re using on your main Showit site, go to Appearance → Customize → Typography (or the equivalent panel in your theme’s customiser) and set the heading and body fonts to match.
If your Showit site uses Google Fonts, these are freely available in WordPress and most themes support them natively. If your Showit site uses premium fonts from Adobe Fonts or a font purchased separately, you’ll need to load these onto WordPress as well. The free plugin Use Any Font handles this – upload your font file and assign it via CSS class names. Alternatively, if you have an Adobe Fonts (Typekit) kit ID, the free Typekit Fonts for WordPress plugin can load it directly.
Colours
Go to Appearance → Customize → Colors (theme-dependent labelling may vary). Set your accent colour, link colour, heading colour, and background. Have your exact hex colour codes from your Showit site open – even a small colour discrepancy between main site and blog will look inconsistent to careful visitors. Your brand’s primary colour should match precisely.
Header and Navigation
Your blog header is separate from your main Showit site header. In Appearance → Customize → Header, upload your logo (same file you use on the main site), set the header background colour, and configure navigation links. The navigation should include at minimum: Home (linking to your main domain), Portfolio, About, and Contact – so visitors can seamlessly move from your blog to your main site without noticing a platform boundary.
Footer
Match your blog footer to your main site footer. Include your business name, copyright notice, and key navigation links. Consistency between blog and main site footers reinforces that it’s all one cohesive brand, not two separate websites that happen to share a domain.
SEO Setup for Your Blog Theme
Once your blog theme is installed and styled, complete the SEO configuration. Your blog’s SEO is independent from your main site and needs its own setup:
- Install Yoast SEO (free) – handles sitemaps, meta tags, breadcrumbs, and canonical URLs. Run the setup wizard immediately after installation.
- Enable XML sitemap in Yoast – this generates the sitemap at
yourdomain.com/blog/wp-sitemap.xml - Submit the blog sitemap to Google Search Console – go to Search Console → Sitemaps → add the sitemap URL
- Set Yoast title template – in Yoast → Search Appearance → Content Types → Posts, set template to
%%title%% %%page%% - Write a custom meta description for every post – fill in the Yoast meta box on each post before publishing
For the full Showit SEO setup process beyond just the blog, including main site page titles and the crawlable text approach, see our complete Showit SEO settings walkthrough.
Blog Post Design: What You Can and Can’t Control
It’s important to understand the design boundary within Showit’s architecture. You have two layers of blog design control:
Blog listing page (the page showing all your posts, usually at yourdomain.com/blog/): This can be designed in the Showit canvas using a blog embed component. You have full Showit canvas-level control over the layout, card design, grid structure, and how post previews are displayed. This is where most of the visible design matching happens.
Individual blog post pages: These are rendered by your WordPress theme. You cannot design them in the Showit canvas – the theme controls the layout, sidebar, header, footer, and typography on each post page. This is why a well-chosen and properly customised WordPress theme is non-negotiable for a polished blog experience.
This is also why the font and colour customisation steps above matter so much – since you can’t canvas-design individual post pages, the theme has to carry the full visual identity of your blog on those pages.
Frequently Asked Questions
Q: Why does my Showit blog look different from my main site?
Your main Showit site and your blog use entirely different design systems. The main site uses Showit’s canvas designer. The blog uses a WordPress theme. If they look mismatched, it means your WordPress theme hasn’t been configured to match your Showit site’s fonts, colours, and overall style. Either install a matching WordPress theme from your original template package, purchase a matching standalone theme, or customise your current WordPress theme to align with your brand.
Q: Can I design my Showit blog posts in the Showit canvas?
Individual blog post pages cannot be designed in the Showit canvas – they’re rendered by your WordPress theme. What you can design in the Showit canvas is the blog listing page (the archive page showing all posts). The post pages themselves are controlled entirely by your WordPress theme, which is why choosing and customising the right theme is critical for polished individual post pages.
Q: Do I need to buy a new blog template if I switch my main Showit site template?
Not necessarily. If you switch to a new Showit canvas template that includes a matching WordPress theme, installing the new theme will align your blog with your new main site aesthetic. But if you’re updating your main site design while keeping the same general aesthetic (same fonts, same colour palette), your existing WordPress theme may only need minor adjustments rather than a full replacement.
Q: How do I access my Showit WordPress blog dashboard?
Your WordPress login URL is typically at yourdomain.com/blog/wp-admin/. If you’ve never logged in, or if you’ve forgotten your credentials, you can reset them via your Showit account dashboard or through WordPress’s standard password reset on the login page. Showit sets up WordPress credentials when you first activate your blog plan – check your original Showit welcome emails for the initial credentials.
Q: What should I publish on my Showit photography blog to help SEO?
Three types of posts consistently perform well: session and wedding features (write one after every client shoot – these rank for venue names and location searches), local tips posts (what to wear, where to shoot, seasonal advice for your area), and vendor features (write about your favourite local venues and vendors to build relationships and earn backlinks). Aim for at least two posts per month. Consistency over a year builds a content depth that significantly outranks competitors who blog infrequently.
Ready to Build a Website That Gets Results?
If you’re serious about your photography business or service-based website, getting the foundations right makes every other marketing effort work better. Adil Makhdoom specialises in Showit and WordPress websites for photographers and small businesses – built to rank, built to convert. Reach out on TheAdil.me to discuss your project.